Accepted File Formats
To ensure that your memory board prints the highest quality product, we ask that the photos are a high-resolution JPEG files. Low-resolution photos will not print well at standard size.
Editing or adjusting your photos in Photoshop? Please confirm the following:
- The color space is in RGB format (not CMYK)
- 8-bit color
- Files are saved in the Baseline Standard JPEG format
- files saved using Progressive Scan might not upload correctly
- Use as little compression as possible for best results
We do not offer a service to convert files into other formats, so please edit and save according to our recommended guidelines.
Flatbed Scanning Tips
If you’re seeing a white boarder around your images after you’ve scanned them on a flatbed scanner then this error needs to be fixed before you upload your image files onto our site. This will affect your final product.
Usually what happens when this occurs is that the scanning area was not clearly specified and the entire bed of the scanner was scanned (all the white space you see around your image). If this occurs, your photos need to be re-scanned or cropped.
Re-scan your photo and specify the area that needs to be scanned.
- Most scanners offer this option through a preview
- If you are unfamiliar with this process, please consult your scanning manual.
- Once the image is re-scanned correctly, you can upload it and continue creating your memory board.
What does image resolution mean? How does resolution relate to file size?
Image resolution is typically described in PPI = pixels per inch of an image.
Higher resolutions mean that there are more pixels per inch (PPI), resulting in more pixel information and creating a high-quality, crisp image.
Images with lower resolutions have fewer pixels, and if those few pixels are too large (usually when an image is stretched), they can become “pixelated” or unclear, blurry, fuzzy…
When you change the resolution of an image, you are saying how many pixels you want to live in each inch of the image.
For example:
An image that has a resolution of 600 ppi will contain 600 pixels within each in of the image.
600 is a lot of pixels to live in just one inch, which is why 600 ppi images will look very crisp and detailed. Compare that to an image with 72 ppi, which has a lot fewer pixels per inch, and won’t look nearly as sharp.
The general rule is: When scanning or photographing, always try and capture the image at the largest resolution/quality.
The higher the resolution of the photo, the greater the file size, the higher the quality.
File Size
Compression can reduce the size of the file, but it also affects the quality of the photo which may produce undesirable results when prints.
Many digital cameras and photo editing programs allow you to control the amount of JPEG compression; however, increasing the amount of compression reduces the file size but also reduces photo quality.
Additional Quick Tips
- Upload FIRST, then crop!
- It’s easier to adjust and change as needed once the original image is uploaded.
- Double check your photo resolution. Higher resolution = better quality print
- If your photo doesn’t meet our recommended resolutions, the photo will display on the site with a warning. This doesn’t mean the photo won’t print, but the quality could be affected.
- Check for overall photo quality!
- Our system can check for resolution but can’t check for quality, clarity, focus, composition of the photo.
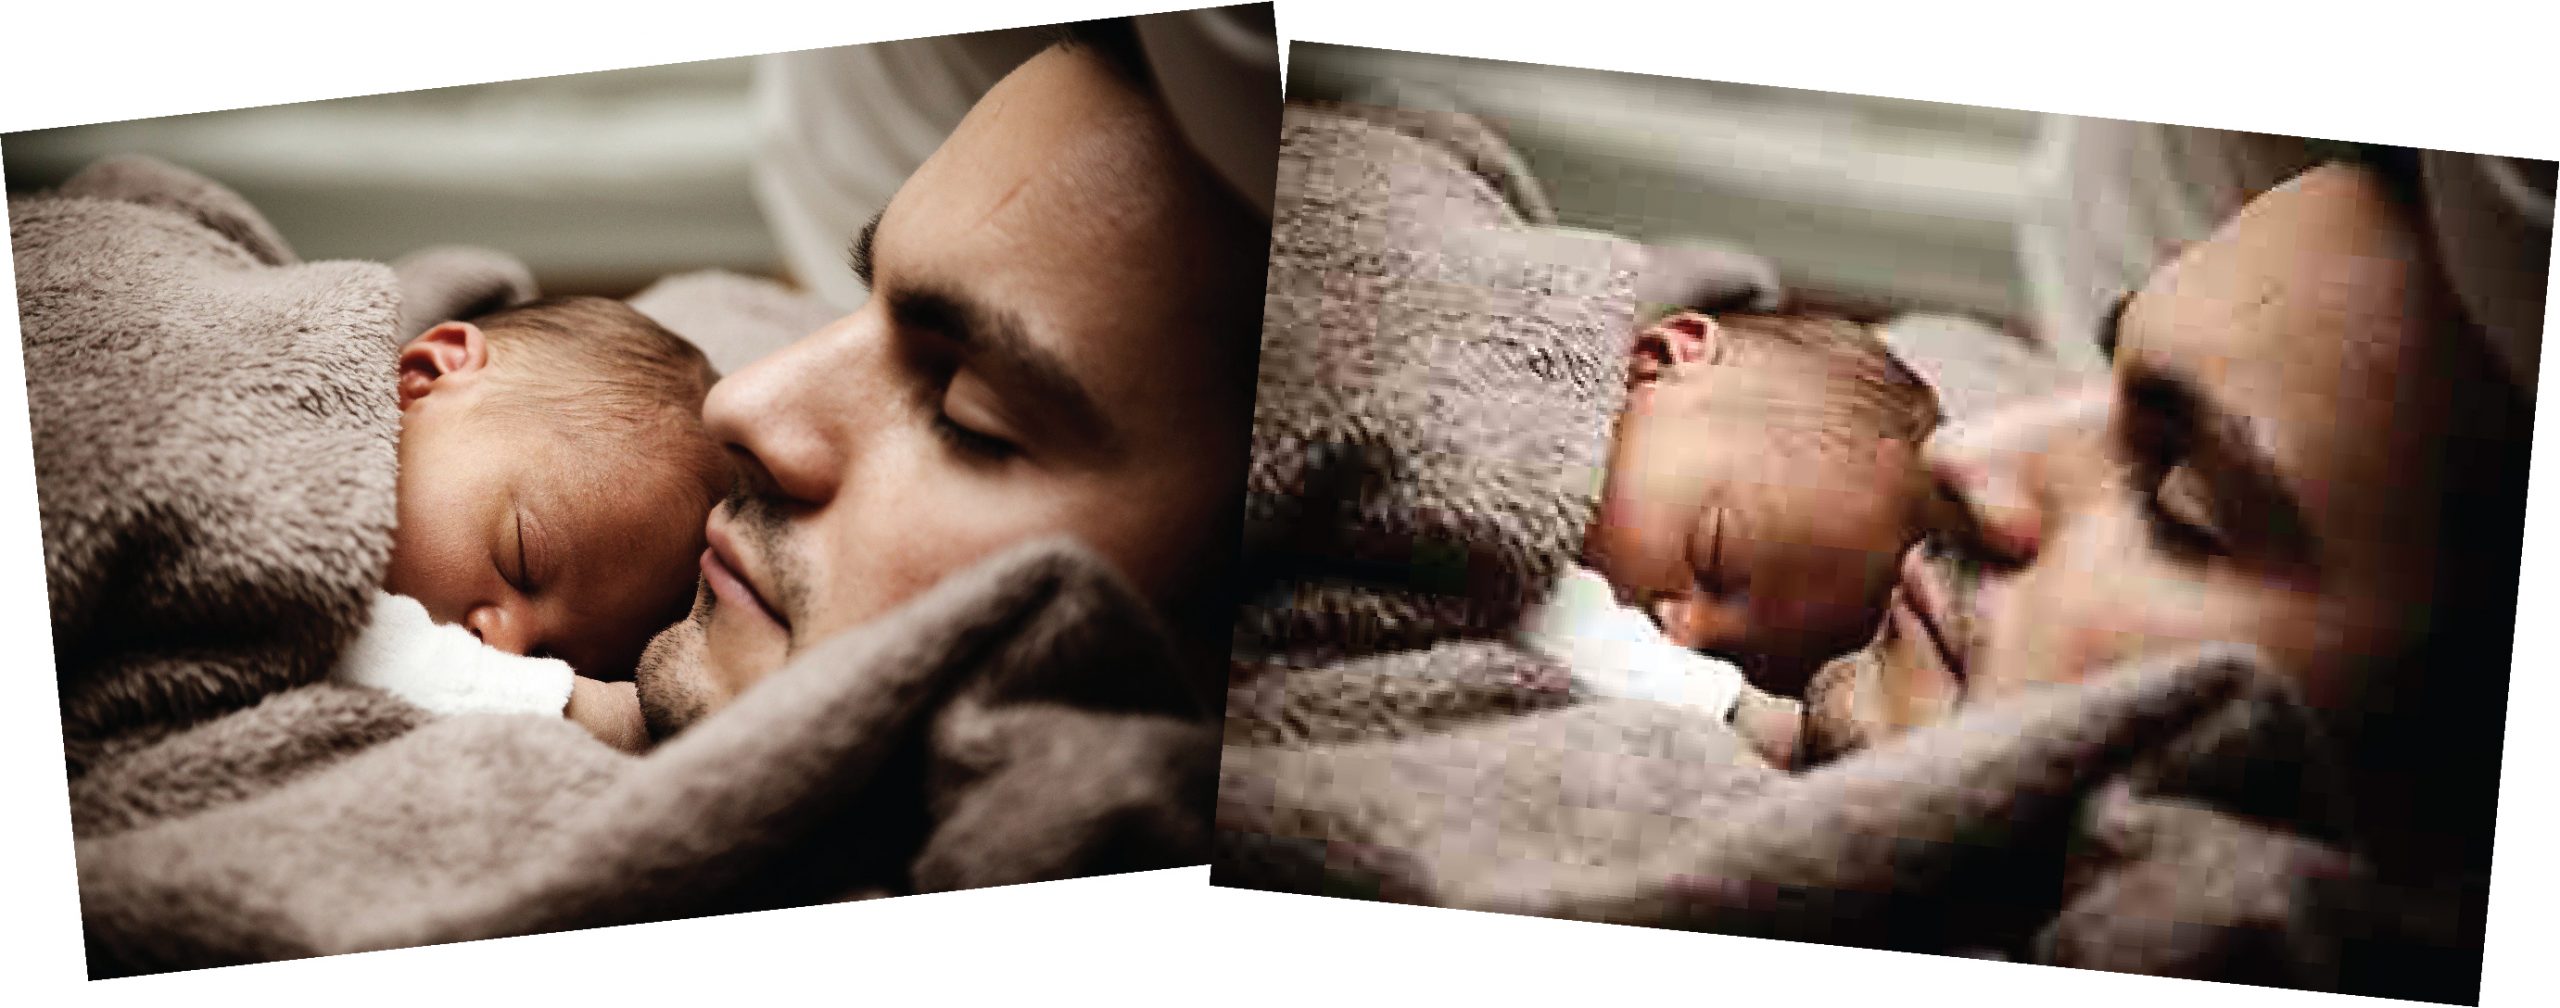
Below is a sample of the difference between high resolution photo and low resolution photo for comparison.
What photo resolution is recommended?
Most modern digital camera photos easily exceed our minimum recommended dimensions.
- Set your camera to 3 megapixels or more.
- (Using larger than 10 megapixels isn’t necessary)
If you have an older digital camera or are using a lower-resolution setting to save space, we still recommend using a setting of:
- At least 3 megapixels
- At least 1200 x 900 megapixels
A good “resolution” recommendation is based on the final resolution output of a digital file; therefore, we can’t give a good recommendation on PPI (Pixels per Inch), LPI (Lines per Inch), or DPI (Dots per Inch). Please look at the final output resolution after the digital file is created to determine if it will print well based on the above-recommended resolutions.
What happens if I lose Internet connection or turn off my computer during an upload?
If you lose connection while you’re using the Upload tab, we won’t automatically retry uploading. You will need to initiate your upload again.
Uploading Tips:
- connect your phone to your computer via USB cable
- import the photos and videos to a specified location on your computer
- upload them to our site using the Upload tab in your account
Photos from Facebook
Photos uploaded from Facebook are automatically sized for storage. When you upload these photos, they may not have sufficient resolution for larger templates. It is best to use the original photos if you have them available.
Creating a Memory Board without a Digital Camera
You can create a memory board collage in a variety of ways – even without a digital camera!
- You MUST have a high-resolution digital picture, which usually come from a digital camera or scanner.
Using traditional prints? No problem! Digitize them.
- Scan your photos
- Use 300 dpi or greater
- Save the file as a jpeg
- (keep the jpeg quality at 80% or better for best results)
You’ve now digitized your prints and can use them in your memory board collage.
Approving this proof must be your responsibility before your job can proceed to production. Life’s Moments cannot be responsible to proof nor approve the work for any typographic errors, omissions or mistakes. The color proofs as they appear on your monitor are only a close representation of the final printed piece.